Showing posts with label Distressed furniture. Show all posts

Wednesday, September 14, 2011

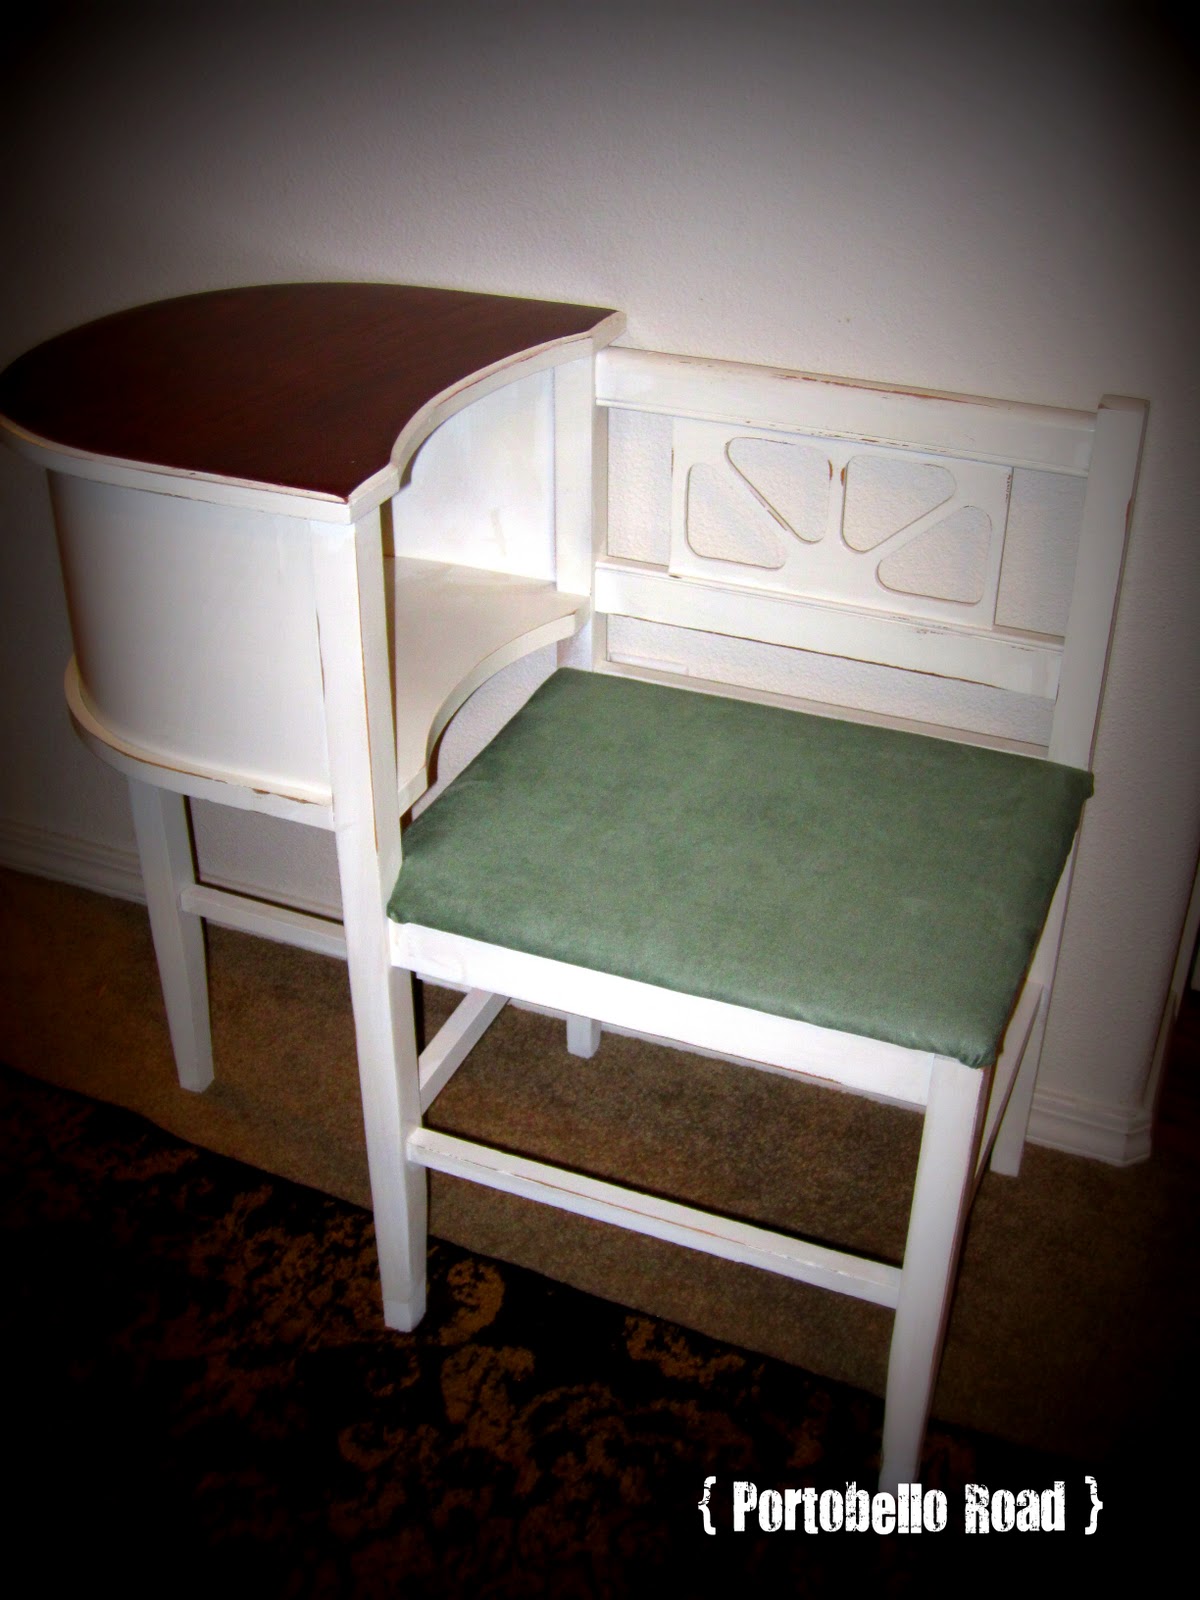
Phone Table...a what?

Have you ever heard of a phone table?  I hadn't!  I mean I did grow up in a time where our phones were attached to the wall.  I mean we are talking old school yellow plastic phones.  No snazzy silver cordless phones, not even cell phones were in possession yet.  When rotary phones were in play, they used to put them on these tables.  The phone book went in the little cubby.  My sister picked up this antique for me at a local garage sale.  Which in my opinion is the best place to find furniture that are waiting for make-overs.  It's cheap and usually people are desperate to not bring the item back in their house.

I don't know why I am failing so bad at the before pictures, just think of a yellowish brown 70's colored wood.  It was actually way uglier than the top color that has been sanded down here.  But I put back the seat so you could see the lovely color it was before.  It almost matches my blog...hmmm, note to self maybe change blog design.

It was a pretty easy project.  First I unscrewed the seat and put it aside.  Then, I just sanded down the top because I knew I wanted to stain it.  Taped it off.  I cleaned it with a baby wipe because I was out of tack cloths (ideal).  Got out my HVLP Graco paint sprayer which you can find at your local Lowes.  Although this project could have easily been done with a plain old paint brush.  I painted it with a $5 a gallon oops paint which has actually become quite handy for me because it is a white premium paint and primer combo.  Just takes out a step for me.  Loving that!


A sprayed with 2 coats of white. I distressed it lightly with my electric sander because its quick, but you can use a sanding block.  I like the 3M medium 100 grit.  I then chose my stain for the top.  I went with Minwax Rosewood.  Again clean off with a tack cloth before you stain.  I find applying stain with a foam brush works best.  You can really control where it goes.  Always have a rag nearby for wiping.  I let it dry for about 24 hours before sealing it. 
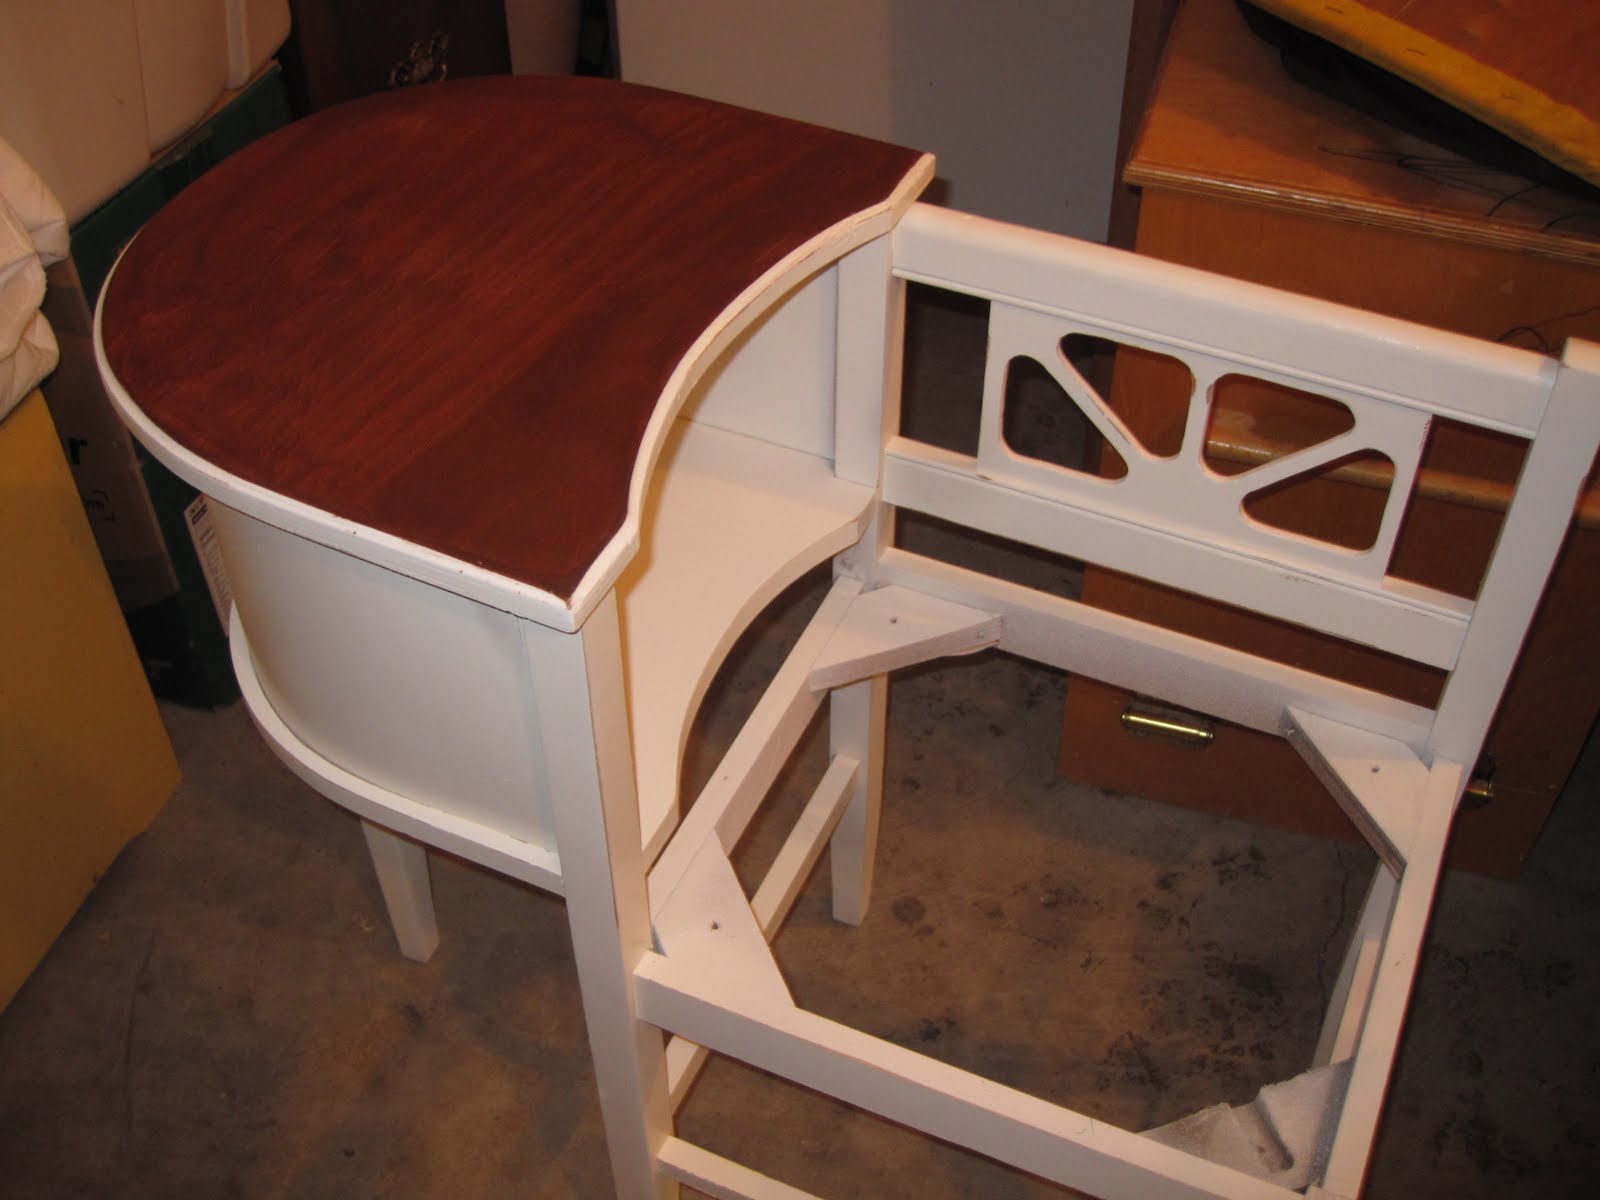
Then put a seal on the whole thing.  Sometimes I spray on poly, not this time.  I stained the top so I chose a wipe on poly for that and then I used a water based poly for the top.  Anything painted white should be sealed with a water based poly.  Otherwise it might yellow.  I prefer Minwax Water-Based Polycrylic.  The blue can :)  I painted on two coats. The top with the wipe on, three coats.


Let it dry, read the can but usually a few hours, longer before it is actually used.  I then recovered the seat with a damask gold upholstery fabric.  I am not in love with the fabric, I think I might change it to a light aqua.  But this is it for now.  When re-covering something a good rule of thumb is to take off the existing fabric, in my case, pleather and trace the new fabric with the same pattern.  I was lazy and just eyeballed it.  But it turned out pretty good, don't cha think?


I changed the seat fabric, I just wasn't feeling the
gold damask with the cherry top. Cuter now!


Featured on:

Furniture Feature Fridays

Friday, August 12, 2011

Happily ever after... (Death by dresser, part 2)

So here it is, the happily ever after... If you have not read Death by Dresser part 1, read here.
The first part of this post is not happy yet, actually quite sad for me.  Remember the sunny morning that ended in disaster.  Here it is, they last thing you want to happen to your wet paint...RAIN!!!!  Living in Portland, Oregon this does happen.


 It ended okay though, I just had to sand everything down and basically start over.  I put waaaaaaaaaay too much time into this piece.  But it was for a good friend so it was worth it.  So the next problemo was this bump...do you see it, a really big bubble right on the top of this beautiful dresser.  I think I was thinking it was go away.  But nope it was just as big as when I started.  I also think, I did not know how to deal with it.


Here is how I dealt with it...I got my exacto knife and just carved that bubble right out.  It was veneer on top so it came out pretty easy.  Just sanded it all down to be flat and then painted for the what...the 5th time.  Boo!

I am not even going to tell you what happened next, because you know what this post is, a new chapter in the series of the unfortunate events.  It always gets worse before it gets better.  Let's turn this around and talk about my favorite step when refinishing furniture...the tape.

 Let me elaborate on that a little.  I love when it is time to peel off the blue tape when painting.  I am not sure why.  Maybe that clean fresh line or the fact that it means you are almost done.  Probably a little of both.  I then needed some lining for my drawers.  I was going to use felt because I can't stand contact paper.  But when I got to the fabric store, I spotted this oh so cute more appropriate for a kitchen, but will work great reusable grocery bag fabric.  I love the way it turned out!


Here it is, I love the glass knobs my friend chose.


And after a 3 hour trip from Portland to Seattle, here she is living happily ever after in her home.


Being Featured at:
Furniture Feature Fridays

Thursday, July 21, 2011

Death by Dresser... (Part 1)

This dresser is killing me!
I do love this beautiful curvy lined mahogany dresser, but I am afraid the combination of my inexperience and the horrible shape it was in has caused many hours of frustration and also in a wierd way, enjoyment. I have learned alot and I am here to share.

Let's start at the very beginning...it's a very good place to start.


Isn't it pretty!  I bought this dresser/changing table from the cutest couple up in north Portland.  They had the coolest house with a little garden in the front.  I brought it home and my sister suggested I take the top piece off and just sell it as a dresser.  Which I did not even think of because I honestly thought the top was part of it, when she said that I realized it was added later.  I debated about this for a while, because I thought it was soooo cute as a changing table.  So cute, I wanted to keep it for myself and our next child (still TBD).  But then I showed some pics to an interested friend up in Seattle.  She also fell in love and said she must have it!  Decided--we go topless!

So the top actually came off suprisingly easy.  I think it has been the easiest part so far.  After I took off the top with my hammer and screwdriver, I cleaned-up the little dust bunnies and spider webs.  I did not think my friend Tev would want new pets in her house.   I filled the holes with my trusty Elmers wood filler and then sanded. Did not need to do much sanding since there was really no sealant left, just stained wood.  There were so many dings and holes though, I just kept filling and filling.  I probably should have just left some for the distressing look.  But I like to be in control of that part.  I like to start from scratch.  Maybe that is bad..I don't know, but it is my preference.

Then I primed with my tinted (I learned my lesson with the red chair) Zinsser 123 primer.  I had it tinted by Lowes in a brownish beige color.  Easy peasy.

Here it comes...I went for my normal morning walk, it was a beautiful sunshiney morning, came home made some lunch, put my little boy for a nap, went to the garage, layed out my paint cloth's, got my paint sprayer ready...painted.  Looked great, went inside to clean everything out, came back out..........(insert scream here) It had started to sprinkle all over my freshly painted drawer fronts.

To be continued...

Friday, July 8, 2011

Cute little green desk

Silly me!  I started this post last week and then got side tracked (it happens to us Gemini's).  So here is a story of a cute little green desk...


Original glory...not so glorious in my opinion.


A 180-grit sanding block got to dig in on this primed and painted piece.  The primer- water based Zinsser 123.  The paint-Olympic "oops paint" $1.25 from Lowe's in a sagey green grey color


I wanted a more grey than brown glaze on this piece because I kinda had that all going on.  A lot of grey in the paint as well as the dark pewter colored knobs.  So I chose to mix a little Varathane Espresso with my new love (sorry hubby) Valspar Clear Mixing Glaze.  The glaze makes it so you have a little more time to work with your stain.  But not too long, I left my top coat on a little too long and had to work some magic with a little sprayed water.  It was almost disastrous.  I would only do for example two drawer fronts at a time.  Brush your glaze mix on to the front heavy like.  Then about 2 minutes later wipe off with a dry rag first if you want more off, dampen your rag.  If you want more on, apply another coat or you can add more stain to your mix.  I start with eyeing about a tsp of stain to 1/2 cup glaze.  You can always add more from there of either product.


See the sort of a grayish tone. Sorry for the little blur in all of my pictures, that would be my husband ruining our camera about 6 months ago.


Almost done, don't you love these art deco type half cup pulls!  I heart them!


I even took it a step further and took off the small pulls and spray painted them a darker silver.  In my opinion it did not quite match close enough.  Simple desk waiting for the perfect space.